Best Kayak Fish Finders for Anglers
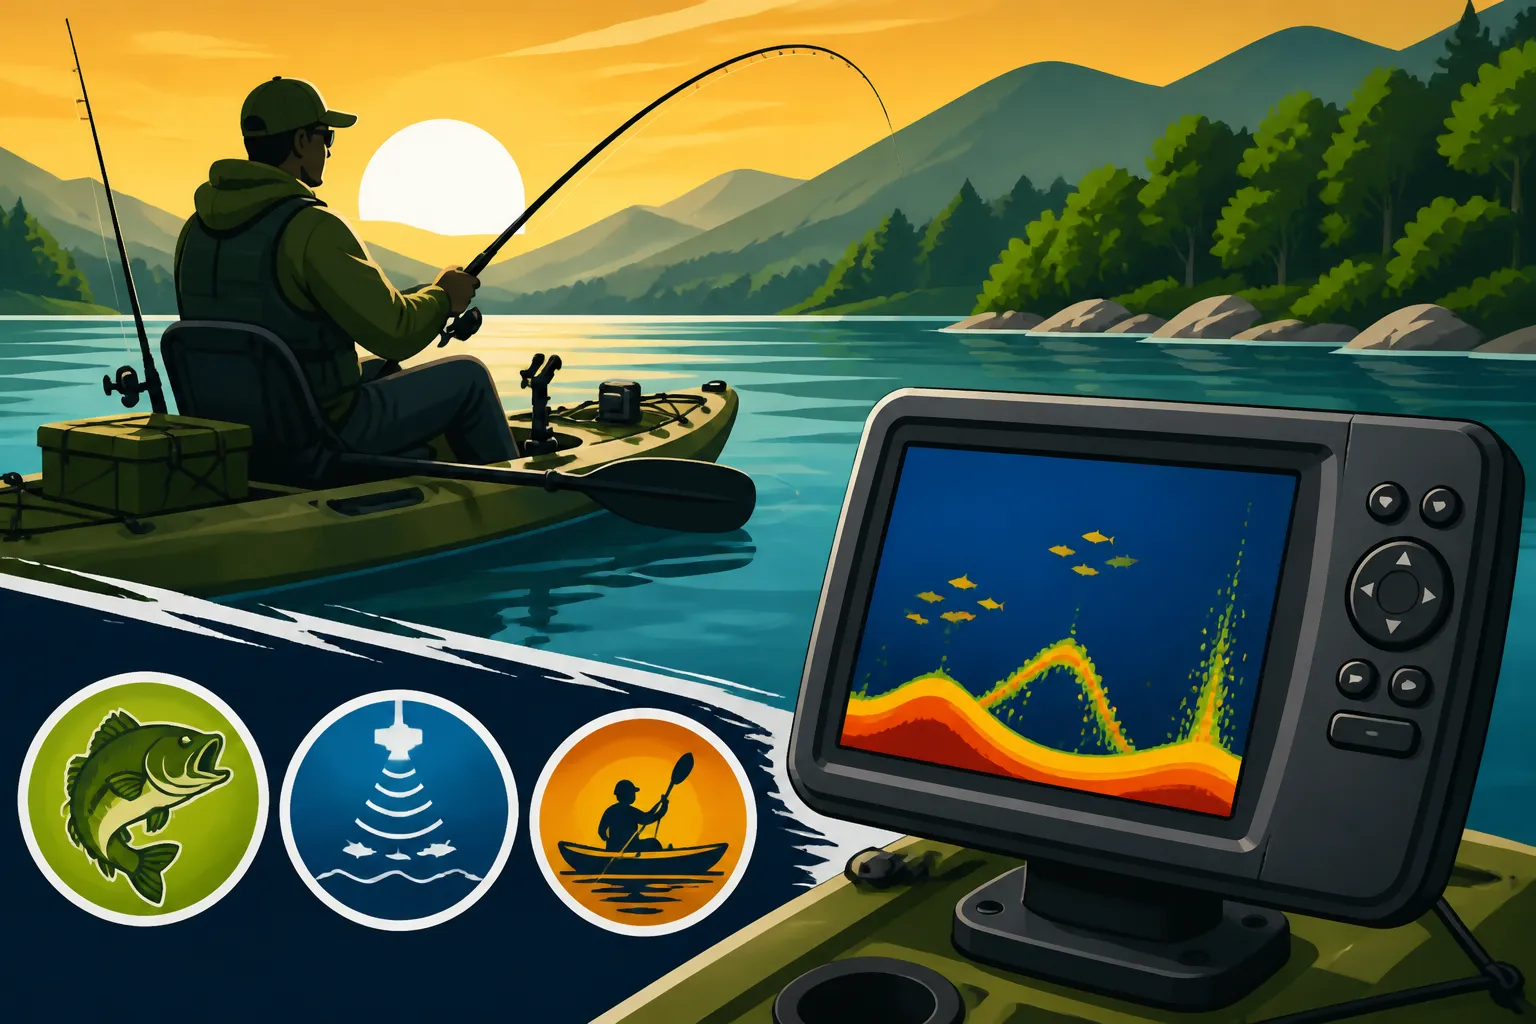
There’s nothing quite like the stealth and intimacy of kayak fishing on Tennessee's incredible waterways. You glide silently, feeling closer to the water than in any big boat. But that closeness also comes with a challenge: how do you find the fish when you can’t see beneath the surface? This guide is going to walk you through everything you need to know about choosing, setting up, and effectively using the best fish finder for your kayak, transforming your fishing adventures from guesswork into precision.
Why a Kayak Fish Finder is a Game Changer for Tennessee Anglers
When you're out on the vast expanses of Kentucky Lake, the winding rivers like the Clinch, or even a smaller, serene state park pond, the struggle is real. You're paddling, casting, and hoping, but often feel like you're fishing blind. Kayak fishing offers unparalleled access to tight spots and shallow coves that larger boats can't reach, but that advantage can be lost if you don't know where the fish are hiding or what structure lies beneath your hull. This is where a fish finder steps in and becomes an absolute non-negotiable piece of gear for serious kayak anglers.
Overcoming the "Blind Fishing" Frustration
Think about it: how many times have you paddled over what looked like a perfect fishing spot, only to cast for an hour with no bites? Or worse, how many times have you been convinced fish must be there, but you just couldn't locate them? The inherent silence and low profile of a kayak are huge assets for approaching wary fish, but they don't give you X-ray vision. Without a fish finder, you’re essentially guessing at depths, guessing at bottom contours, and guessing if any fish are even present. It's like trying to find a needle in a haystack while wearing a blindfold. A fish finder gives you that crucial insight, turning unproductive stretches into informed targets.
Imagine you're targeting crappie on Percy Priest Lake. You know they love brush piles and submerged timber, but these are invisible from the surface. A fish finder will literally paint a picture of these hidden havens, showing you not just the structure, but often the fish holding tight to it. This takes the guesswork out and lets you focus your precious casting time on productive water. It’s about working smarter, not just harder, especially when your paddling effort is part of the equation.
Gaining an Edge on Structure and Depth
Tennessee's lakes and rivers are full of incredible underwater structure – old creek beds, submerged roadbeds, rock piles, humps, and ledges. These are prime locations where all sorts of fish, from largemouth bass to catfish, will congregate. Trying to map these out from a kayak using just a topographical map or memory is incredibly difficult, if not impossible. A good fish finder will display these features in real-time, allowing you to identify transition zones, drop-offs, and cover where fish are likely to ambush prey or seek shelter.
For instance, understanding the depth where fish are holding is critical. Are the smallmouth bass suspended at 15 feet over a 30-foot bottom on Dale Hollow Lake? Or are they hugging the bottom in 8 feet of water near a rock ledge? Your fish finder will tell you. This information allows you to adjust your lure depth, presentation, and even your approach. It’s not just about seeing individual fish marks, though that's certainly exciting; it's about understanding the entire underwater landscape and how fish relate to it. This intelligence helps you pattern fish throughout the seasons, whether you're chasing the Bass Spawn Timing in Tennessee Lakes or exploring Deep Water Techniques for Striped Bass.
Essential Features to Look For in Your Kayak Fish Finder
Choosing a fish finder for your kayak isn't like picking one for a massive bass boat. You've got different constraints and priorities: space, power, portability, and ease of mounting. You need a unit that works with your setup, not against it. Let's break down the key features that will make the biggest difference in your kayak fishing experience.
Sonar Technology: The Eyes Beneath Your Boat
The core of any fish finder is its sonar. This is what sends out sound waves and interprets the echoes to show you what's down there. For kayaks, you'll primarily be looking at a few types:
- Traditional 2D Sonar (CHIRP): This is the classic, cone-shaped beam that shows fish arches and bottom contours. CHIRP (Compressed High-Intensity Radiated Pulse) is a massive upgrade over older traditional sonar. Instead of a single frequency, it sends a range of frequencies, offering much clearer target separation and less clutter. You'll be able to distinguish a fish from a piece of structure, and even separate individual fish in a school. For general all-around fishing, a good CHIRP 2D sonar is your bread and butter. It's fantastic for telling you what's directly beneath your kayak.
- Down Imaging/DownScan: This technology provides a picture-like view of what's directly below your kayak, almost like a photograph. It uses a much narrower, fan-shaped beam that's excellent for clearly defining structure like trees, brush piles, or rock formations, and showing fish in relation to that structure. If you’re fishing for crappie or bass hiding in cover on Watts Bar Lake, down imaging is invaluable for pinpointing those exact spots. It helps remove the guesswork of "is that a log or a school of fish?"
- Side Imaging/SideScan: Now we're getting into the really advanced stuff, and it's a huge advantage for kayak anglers covering a lot of water. Side imaging shoots beams out to the sides of your kayak, typically 100-200 feet in each direction. This allows you to scan a massive area on either side as you paddle, revealing structure, baitfish, and game fish that you would have completely missed with traditional or down imaging alone. Imagine paddling down the Tennessee River, and your side imaging shows a massive school of baitfish or a submerged roadbed off to your left that you didn't even know was there! For quickly locating offshore humps, ledges, or extensive brush piles, side imaging can save you hours of unproductive casting. However, it does require more processing power and typically comes on higher-end units.
Display Size and Type: Seeing the Whole Picture
The display is your window to the underwater world, and its characteristics are crucial for a kayak where space is at a premium and conditions can be harsh.
- Size: Kayaks have limited dashboard real estate. While a bigger screen is always nicer for detail, you have to balance it with mounting space. Units typically range from 3-inch to 9-inch screens. For basic 2D sonar, a 4-5 inch screen might suffice, but if you're serious about interpreting side or down imaging, a 7-inch or larger display will make a world of difference. You don't want to be squinting at tiny fish marks while trying to maintain your paddle stroke.
- Resolution: Higher resolution (more pixels) means a clearer, sharper image, making it easier to distinguish fish from structure. Don't just look at screen size; look at the pixel count. A smaller, high-resolution screen can often be more useful than a large, low-resolution one.
- Color vs. Grayscale: Almost all modern fish finders are color, and for good reason. Color displays make it much easier to differentiate between hard and soft bottoms, interpret fish arches, and see the intensity of sonar returns. Bright, crisp colors improve visibility, especially in bright sunlight on the water.
Portability and Mounting Options: Kayak-Specific Needs
This is where kayak fish finders truly diverge from their big boat counterparts. Your mounting needs are unique.
- Portability: Many kayak anglers prefer portable units or units designed for quick detachment. This makes transporting your gear easier, protects it from theft, and allows for flexible mounting on different kayaks or even shore fishing setups. Some units come with portable kits that include a small battery and suction cup transducer mount.
- Mounting: You'll need a robust mounting system. RAM mounts are a popular choice, offering flexibility and sturdy attachment points for your display head. Consider where the unit will sit so it's visible without obstructing your paddling or casting. Will it go on a track system, a console, or directly to the kayak hull? For the transducer, you might use a scupper hole mount, a suction cup mount (for occasional use), an in-hull mount (shooting through the plastic), or a transom mount on a stern-mounted motor or specialized bracket. The goal is to get the transducer properly submerged and free from obstruction. Best Fish Finder Mounts for Kayaks can offer more insights here.
Power Source and Battery Life: Staying Charged on the Water
Fish finders need power, and unlike a boat with a large cranking battery, kayaks rely on smaller, dedicated power sources.
- Battery Type: Lithium-ion (LiFePO4) batteries are increasingly popular for kayaks. They are lighter, last longer, and maintain voltage better than traditional lead-acid batteries. A 12V battery is standard.
- Battery Life: Consider how long you typically fish. A 7-amp hour (Ah) battery might give you a full day on a smaller, 2D-only unit, but a larger screen with side imaging will drain power much faster. You might need a 10Ah or even a 12Ah battery for extended trips, or carry a spare. Always check the unit's power draw specifications.
- Charging: Make sure you have a reliable charger for your battery. Solar chargers can be a great addition for multi-day trips or off-grid adventures, though not essential for everyone.
GPS and Mapping: Navigating and Marking Hot Spots
While some basic fish finders omit GPS, for serious anglers, it's an incredibly valuable feature.
- Built-in GPS: This allows you to mark waypoints for hot spots (like that brush pile where you caught a monster bass), launch points, or navigation hazards. It’s crucial for revisiting productive areas.
- Mapping: Many units come with pre-loaded base maps, and some allow you to add detailed lake maps (like those from Navionics or LakeMaster). These maps show contours, depths, navigation markers, and points of interest. Being able to see your position on a detailed map, especially on large lakes like Chickamauga or Norris, is a massive advantage. You can track your drifts, follow specific depth contours, and explore new areas with confidence. Tennessee's Top Bass Fishing Lakes often have excellent mapping available.
Ease of Use and Durability: Kayak Realities
Lastly, consider the practicalities of using the unit on the water.
- User Interface: Is it intuitive? Can you easily navigate menus with wet hands or gloves? Some units have touchscreens, others buttons. For kayak fishing, buttons can sometimes be more reliable in wet conditions.
- Durability: Kayak fishing can be tough on gear. Look for units that are rugged, waterproof (IPX7 rating is common and good), and designed to withstand splashes and bumps.
Getting Your Fish Finder Set Up and Optimized for Kayak Fishing
You've got your shiny new fish finder, maybe you ordered it from Amazon or picked it up at Bass Pro Shops, now what? Installing it correctly on your kayak is absolutely critical to getting accurate readings. A poorly mounted transducer or inadequate power will give you nothing but frustration.
Transducer Mounting: The Key to Clear Readings
The transducer is the "ear" and "mouth" of your fish finder, sending and receiving sonar signals. Its placement is paramount.
- Scupper Hole Mount: This is one of the most popular and often easiest methods for sit-on-top kayaks. Many kayaks have scupper holes that fit specific transducer models or can be adapted with a kit. The transducer sits directly in the water, providing clear, unobstructed readings. Ensure it's flush or slightly below the hull to avoid turbulence.
- In-Hull Mount (Shoot-Through Hull): For sit-inside kayaks or if you want to protect your transducer from damage, you can mount it inside the hull. This usually involves creating a small pool of water or using a special marine-grade epoxy or silicone sealant to glue the transducer directly to the inside of the hull, ensuring there are no air bubbles. The sonar signal shoots through the plastic hull. The downside is a slight loss of signal quality and potential issues with side imaging, as the hull material can obstruct the side beams. However, for 2D sonar, it can work remarkably well and keeps your transducer safe.
- Arm/External Mount: Some kayaks don't have ideal scupper holes or you might prefer an external arm that lowers the transducer into the water. These are usually mounted to a track system or a side rail. This method ensures direct water contact for the best signal, but the transducer is exposed and can be snagged or damaged, and it can create a bit more drag while paddling.
- Portable Suction Cup Mount: While great for temporary use or if you frequently switch kayaks, suction cup mounts can sometimes lose their grip, especially in rougher water or at speed. They're excellent for testing or for very casual use, but for consistent performance, a more permanent solution is usually preferred.
Regardless of the method, ensure the transducer is parallel to the bottom of the lake or river and as free from obstructions and turbulence as possible. Even small air bubbles or a slight angle can dramatically impact your sonar readings.
Powering Your Unit: Keeping the Lights On
As we discussed, kayak fish finders rely on dedicated batteries. Correct wiring and battery management are crucial.
- Battery Box/Bag: Invest in a waterproof battery box or bag to protect your battery from the elements. This also makes for a tidy, organized power setup. Some kits even come with integrated wiring and fuses.
- Wiring: Keep wiring as neat and protected as possible. Use waterproof connectors where necessary, and ensure all connections are secure to prevent intermittent power issues. Always include an inline fuse close to the battery to protect your unit from power surges.
- Battery Placement: Position your battery in a dry, accessible spot that doesn't interfere with your balance or paddling. Many kayaks have dedicated spots in the hull or rear storage areas.
- Managing Power Consumption: If your unit has advanced features like side imaging, a large screen, or a bright backlight, it will draw more power. Dimming the screen when not actively looking, or turning off features you don't need at that moment, can extend battery life. Consider a One-Day License vs Annual License: Which Costs Less approach to your battery usage – short bursts for quick scans, or full power for longer sessions.
Making the Most of Your Fish Finder on Tennessee Waters
Having the best kayak fish finder is one thing; using it effectively is another. It’s not just a fancy gadget; it's a tool that, when combined with your angling skill and local knowledge, can dramatically improve your success.
Interpreting What You See: From Arches to Pictures
Your fish finder is constantly sending you information. Learning to read it is like learning a new language.
- Fish Arches: On traditional 2D sonar, fish often appear as arches. A full, clear arch usually indicates a fish passing through the center of your sonar cone. Half-arches or partial marks can mean a fish on the edge of the cone. The thickness and length of the arch can give you clues about the size of the fish.
- Structure Identification: Down imaging excels here. You'll see submerged trees, brush piles, rock formations, and even subtle bottom changes with photo-like clarity. Look for fish marks (often brighter spots or blobs) in or around this structure. If you're on a familiar lake like Chickamauga, you might even recognize specific humps or old creek beds.
- Side Imaging Scans: This is where you quickly locate "hidden" gems. As you paddle, constantly scan both sides. Look for bait balls, isolated trees, rock piles, or even individual fish marks away from your kayak. Once you see something interesting, you can mark it with your GPS, then paddle over to investigate more closely with your 2D and down imaging. This is particularly effective for finding schools of baitfish that striped bass might be busting.
Combining with Local Knowledge and Conditions
A fish finder isn't a magic wand; it's a powerful supplement to your existing angling wisdom.
- Time of Day and Season: Your fish finder helps confirm patterns. Are fish deeper in the summer heat or shallower during the spring spawn? The fish finder provides real-time validation. If you're wondering about Best Time of Day to Catch Bass, your fish finder can show you exactly where the bass are holding during those prime dawn and dusk hours.
- Water Temperature and Clarity: While your fish finder won't directly tell you water temperature (though many units have a temperature sensor on the transducer), it can show you how fish are reacting to it. How Water Temperature Affects Fish Activity is a critical piece of the puzzle, and your fish finder helps you locate fish at preferred depths. In muddy water after a rain, side imaging can still cut through some murk to find structure.
- Reading the Map: If your unit has GPS and mapping, use it! Compare what you're seeing on the sonar with the contours on your map. This helps you understand the bigger picture and predict where fish might be based on known structure and depth changes.
Mastering Settings and Sensitivity
Don't just set it and forget it! Your fish finder has many adjustable settings that can dramatically improve its performance.
- Sensitivity: This is perhaps the most important setting. Too low, and you'll miss fish. Too high, and you'll get excessive clutter. Adjust it to the clearest possible reading without too much noise, often just below the point where you start seeing speckles.
- Depth Range: Set your depth range to slightly deeper than the water you're fishing. This zooms in on the relevant water column, giving you a clearer picture.
- Color Palette: Experiment with different color palettes on your unit. Some anglers prefer certain color schemes that make fish and structure stand out better against the background.
- Zoom: Use the zoom function to get a closer look at specific areas, whether it's the bottom for structure or a particular depth for suspended fish.
- Frequency: Many units allow you to choose sonar frequencies. Lower frequencies (e.g., 50 kHz) penetrate deeper but have less detail. Higher frequencies (e.g., 200 kHz, or Mega Imaging ranges) provide incredible detail but don't penetrate as deep. For kayak fishing, a dual-beam transducer (e.g., 83/200 kHz) or CHIRP sonar that sweeps frequencies offers the best of both worlds.
By taking the time to understand and adjust your fish finder, you'll gain an unparalleled advantage, turning every paddle stroke into a more informed and potentially more productive fishing experience on Tennessee's amazing waters. Remember, it's about learning, adapting, and enjoying the process!
Disclaimer
This article is for general informational purposes only and does not constitute professional advice. Laws, prices and regulations vary by location and change over time. Consult a qualified professional for guidance on your specific situation.